![[Updated] 2024 Approved Webinar Video Archive Creation](https://thmb.techidaily.com/1b3acf6f92837e9104aa399e6aa268354b94b6b827af6bb095b68b19082ca48f.png)
"[Updated] 2024 Approved Webinar Video Archive Creation"
Webinar Video Archive Creation
How to Record a Webinar

Max Wales
Mar 27, 2024• Proven solutions
A career is a journey on which we are continually learning and developing new skills that make us better professionals. Finding new ways to acquire or share knowledge is essential if becoming successful is your goal. A webinar or a web-based seminar is just one of many ways to connect with like-minded colleagues that share the same interests and gain fresh input on important subjects about the field you are working in.
Recording webinar with Filmora Scrn enables professionals from all walks of life to share the knowledge and experience they have with people around the globe. If you are thinking about starting your own webinar, you’ve come to the right place because in this article we are going to take you, step by step, through the process of recording a webinar with Wondershare Filmora Scrn.
![]() FX PRO (Gold Robot + Silver Robot(Basic Package))
FX PRO (Gold Robot + Silver Robot(Basic Package))
![]()

The All-in-One Screen Recorder & Video Editor
- Record desktop screen, voiceover, and webcam simultaneously
- Edit recorded clips quickly with a wide range of professional tools
- Built-in plentiful templates and effects
- Export to MP4, MOV, MKV, GIF and multiple formats
For Win 7 or later (64-bit)
For macOS 10.12 or later

 Secure Download
 Greeting Card Builder
How to Record Webinars


Producing your first webinar doesn’t require you to be a video-making wizard since Filmora Scrn makes this process simple. Let’s have a look at the steps you’ll need to take in order to record a webinar.
1. Download and Install Filmora Scrn
Visit Filmora Scrn’s official webpage and download this amazing screen recording software. Once the software is installed on your PC, you can launch it and start adjusting the recording settings.
2. Setting up the screen recording session
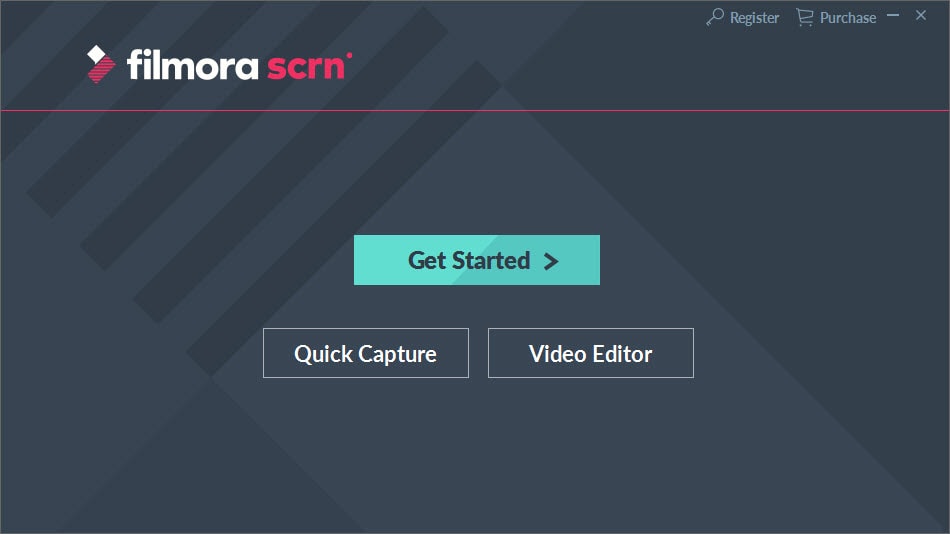
Select the Quick Capture option in the software’s welcome screen and proceed to click on the Setting menu. This action will give you access to the screen recorder’s video recording options. Filmora Scrn lets you change Screen, Audio and Camera options. Adjusting the portion of the screen you’d like to record or choosing the frame rate of the recording can be done from the Screen menu, while in the Camera section you can pick a web camera you intend on using in your webinar, change a resolution or set a frame rate for the footage you’ll be recording with a webcam.

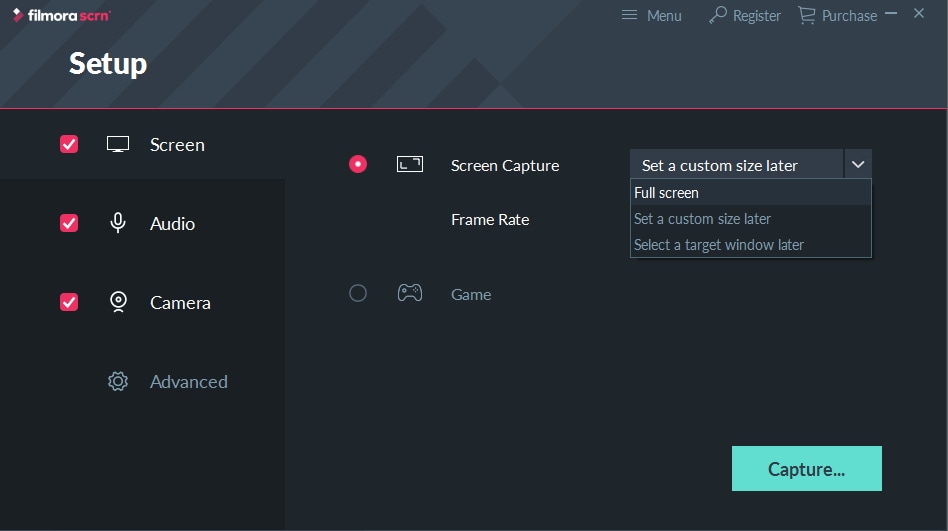
Enabling the Camera option will allow you to capture your screen simultaneously while recording a video with your webcam. This option is particularly useful for people that want to create a webinar that also features them as narrators.
The Audio option contains Microphone and Computer audio options that can be used to select the microphone you are going to utilize during the screen recording session.
3. Recording a webinar
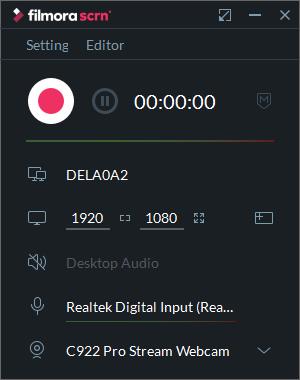
In order to start recording your webinar, you just need to click on the Record button. Filmora Scrn also allows you to record your webcam and your secondary display, which is very convenient for webinar recording. During the session, you can add markers to the footage you’re producing by pressing the F8 key on your keyboard or pause the session with the F9 key.
4. Editing a webinar
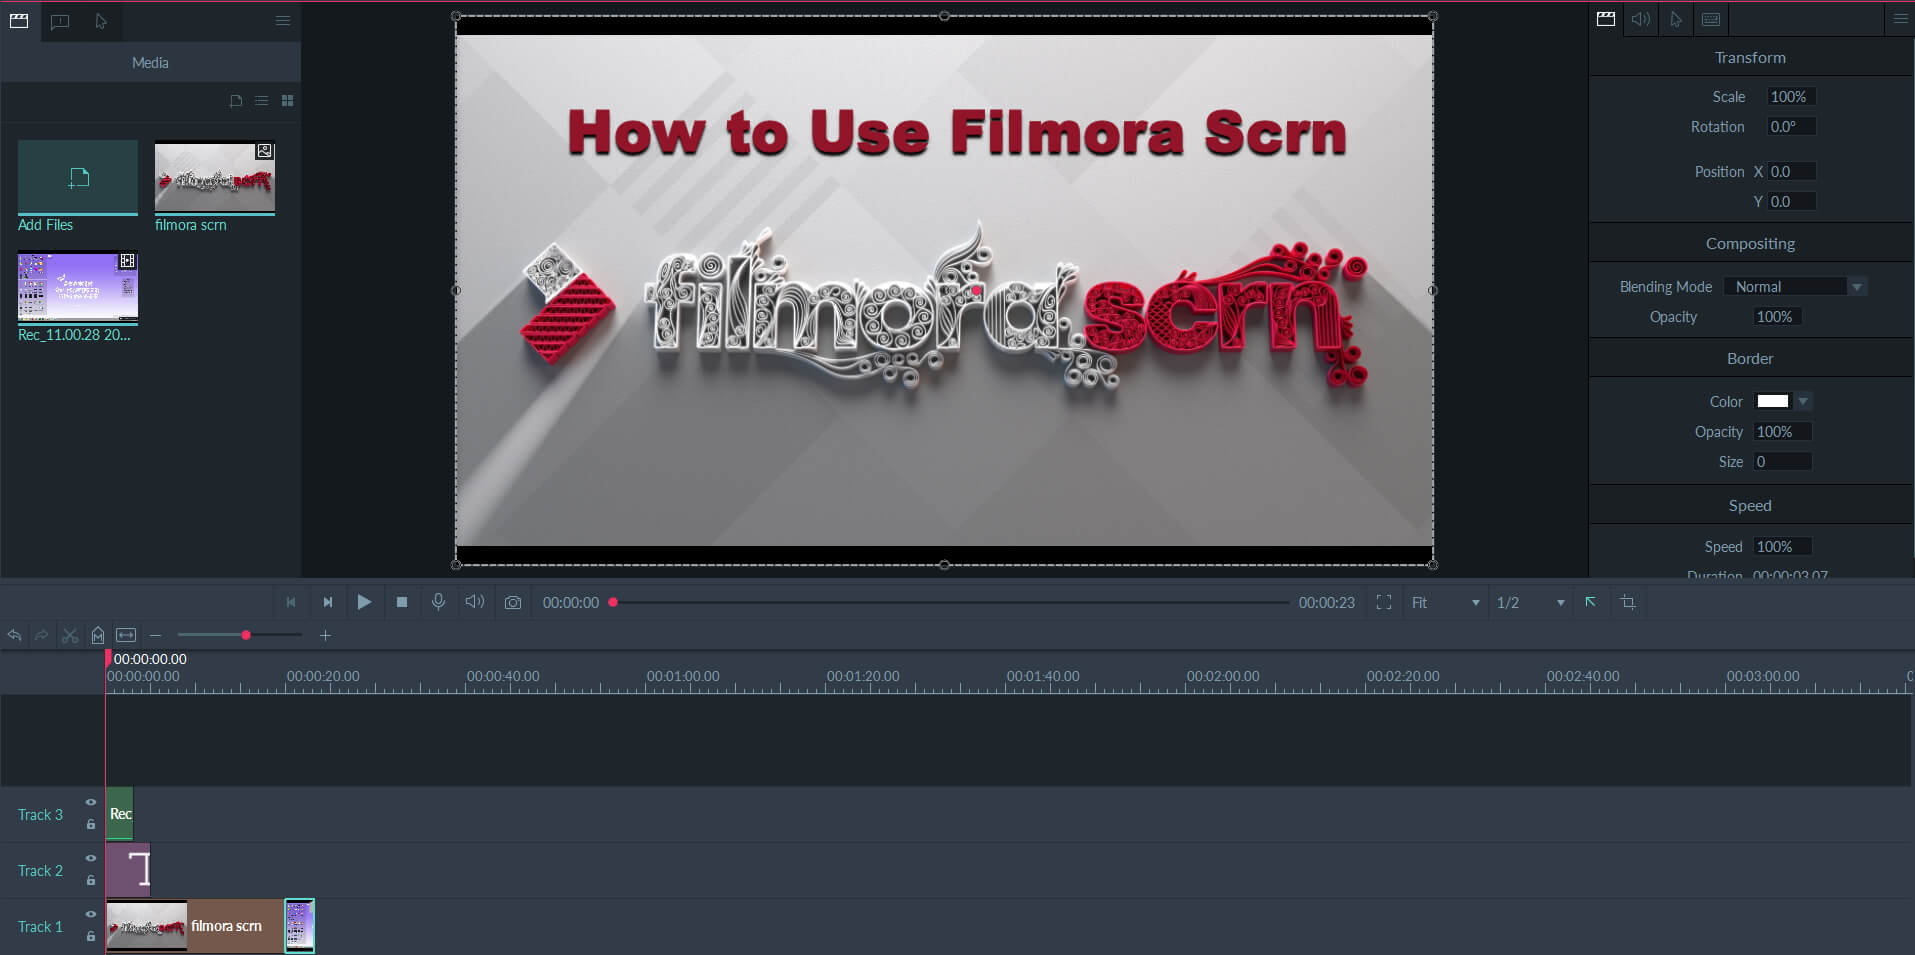
You can stop recording by hitting the F10 key on the keyboard again, and once you complete the recording session, the video file you created will be automatically imported into Filmora Scrn’s video editor. Removing the parts of the video you don’t want to feature in the final cut of your webinar or adding fade in and fade out effects can be accomplished with only a few clicks. Furthermore, the Filmora Scrn video editor allows you to remove the background noises, alter the playback speed of the video or add multiple layers to your videos.
Exporting and Sharing a webinar
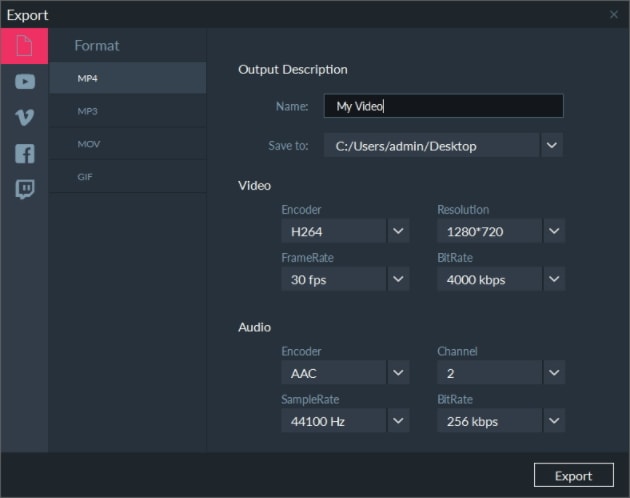
Click on the Export button after you’ve finished editing your webinar and proceed to select the location on the hard drive where your video will be saved, file format or the resolution of the video. Alternatively, you can upload the webinar to YouTube, Vimeo, Facebook or Twitch directly from Filmora Scrn.
Following these simple steps will help you produce insightful and well-rounded webinars that will attract a lot of attention online.
Tips for Recording Webinars
There is much more to making a webinar than just hitting the Record button, so in order to give your videos a more professional look, you should prepare the intro and outro graphics before you start editing your webinar and quickly add them after you’ve completed the recording session.
Making sure that all the settings are adjusted properly and that the amount of background noise is at the very minimum is advised if you’d like to go through the process of making a webinar with Filmora Scrn quick and smoothly.

Max Wales
Max Wales is a writer and a lover of all things video.
Follow @Max Wales
Max Wales
Mar 27, 2024• Proven solutions
A career is a journey on which we are continually learning and developing new skills that make us better professionals. Finding new ways to acquire or share knowledge is essential if becoming successful is your goal. A webinar or a web-based seminar is just one of many ways to connect with like-minded colleagues that share the same interests and gain fresh input on important subjects about the field you are working in.
Recording webinar with Filmora Scrn enables professionals from all walks of life to share the knowledge and experience they have with people around the globe. If you are thinking about starting your own webinar, you’ve come to the right place because in this article we are going to take you, step by step, through the process of recording a webinar with Wondershare Filmora Scrn.
![]()
The All-in-One Screen Recorder & Video Editor
- Record desktop screen, voiceover, and webcam simultaneously
- Edit recorded clips quickly with a wide range of professional tools
- Built-in plentiful templates and effects
- Export to MP4, MOV, MKV, GIF and multiple formats
For Win 7 or later (64-bit)
For macOS 10.12 or later
Secure Download
How to Record Webinars
Producing your first webinar doesn’t require you to be a video-making wizard since Filmora Scrn makes this process simple. Let’s have a look at the steps you’ll need to take in order to record a webinar.
1. Download and Install Filmora Scrn
Visit Filmora Scrn’s official webpage and download this amazing screen recording software. Once the software is installed on your PC, you can launch it and start adjusting the recording settings.
2. Setting up the screen recording session

Select the Quick Capture option in the software’s welcome screen and proceed to click on the Setting menu. This action will give you access to the screen recorder’s video recording options. Filmora Scrn lets you change Screen, Audio and Camera options. Adjusting the portion of the screen you’d like to record or choosing the frame rate of the recording can be done from the Screen menu, while in the Camera section you can pick a web camera you intend on using in your webinar, change a resolution or set a frame rate for the footage you’ll be recording with a webcam.
Enabling the Camera option will allow you to capture your screen simultaneously while recording a video with your webcam. This option is particularly useful for people that want to create a webinar that also features them as narrators.
The Audio option contains Microphone and Computer audio options that can be used to select the microphone you are going to utilize during the screen recording session.
3. Recording a webinar
In order to start recording your webinar, you just need to click on the Record button. Filmora Scrn also allows you to record your webcam and your secondary display, which is very convenient for webinar recording. During the session, you can add markers to the footage you’re producing by pressing the F8 key on your keyboard or pause the session with the F9 key.
4. Editing a webinar
You can stop recording by hitting the F10 key on the keyboard again, and once you complete the recording session, the video file you created will be automatically imported into Filmora Scrn’s video editor. Removing the parts of the video you don’t want to feature in the final cut of your webinar or adding fade in and fade out effects can be accomplished with only a few clicks. Furthermore, the Filmora Scrn video editor allows you to remove the background noises, alter the playback speed of the video or add multiple layers to your videos.
Exporting and Sharing a webinar
Click on the Export button after you’ve finished editing your webinar and proceed to select the location on the hard drive where your video will be saved, file format or the resolution of the video. Alternatively, you can upload the webinar to YouTube, Vimeo, Facebook or Twitch directly from Filmora Scrn.
Following these simple steps will help you produce insightful and well-rounded webinars that will attract a lot of attention online.
Tips for Recording Webinars
There is much more to making a webinar than just hitting the Record button, so in order to give your videos a more professional look, you should prepare the intro and outro graphics before you start editing your webinar and quickly add them after you’ve completed the recording session.
Making sure that all the settings are adjusted properly and that the amount of background noise is at the very minimum is advised if you’d like to go through the process of making a webinar with Filmora Scrn quick and smoothly.
Max Wales
Max Wales is a writer and a lover of all things video.
Follow @Max Wales
Max Wales
Mar 27, 2024• Proven solutions
A career is a journey on which we are continually learning and developing new skills that make us better professionals. Finding new ways to acquire or share knowledge is essential if becoming successful is your goal. A webinar or a web-based seminar is just one of many ways to connect with like-minded colleagues that share the same interests and gain fresh input on important subjects about the field you are working in.
Recording webinar with Filmora Scrn enables professionals from all walks of life to share the knowledge and experience they have with people around the globe. If you are thinking about starting your own webinar, you’ve come to the right place because in this article we are going to take you, step by step, through the process of recording a webinar with Wondershare Filmora Scrn.

![]()
The All-in-One Screen Recorder & Video Editor
- Record desktop screen, voiceover, and webcam simultaneously
- Edit recorded clips quickly with a wide range of professional tools
- Built-in plentiful templates and effects
- Export to MP4, MOV, MKV, GIF and multiple formats
For Win 7 or later (64-bit)
For macOS 10.12 or later
Secure Download
How to Record Webinars
Producing your first webinar doesn’t require you to be a video-making wizard since Filmora Scrn makes this process simple. Let’s have a look at the steps you’ll need to take in order to record a webinar.
1. Download and Install Filmora Scrn
Visit Filmora Scrn’s official webpage and download this amazing screen recording software. Once the software is installed on your PC, you can launch it and start adjusting the recording settings.
2. Setting up the screen recording session
Select the Quick Capture option in the software’s welcome screen and proceed to click on the Setting menu. This action will give you access to the screen recorder’s video recording options. Filmora Scrn lets you change Screen, Audio and Camera options. Adjusting the portion of the screen you’d like to record or choosing the frame rate of the recording can be done from the Screen menu, while in the Camera section you can pick a web camera you intend on using in your webinar, change a resolution or set a frame rate for the footage you’ll be recording with a webcam.
Enabling the Camera option will allow you to capture your screen simultaneously while recording a video with your webcam. This option is particularly useful for people that want to create a webinar that also features them as narrators.
The Audio option contains Microphone and Computer audio options that can be used to select the microphone you are going to utilize during the screen recording session.
3. Recording a webinar
In order to start recording your webinar, you just need to click on the Record button. Filmora Scrn also allows you to record your webcam and your secondary display, which is very convenient for webinar recording. During the session, you can add markers to the footage you’re producing by pressing the F8 key on your keyboard or pause the session with the F9 key.
4. Editing a webinar
You can stop recording by hitting the F10 key on the keyboard again, and once you complete the recording session, the video file you created will be automatically imported into Filmora Scrn’s video editor. Removing the parts of the video you don’t want to feature in the final cut of your webinar or adding fade in and fade out effects can be accomplished with only a few clicks. Furthermore, the Filmora Scrn video editor allows you to remove the background noises, alter the playback speed of the video or add multiple layers to your videos.
Exporting and Sharing a webinar
 Screensaver Factory, Create stunning professional screensavers within minutes. Create screensavers for yourself, for marketing or unlimited royalty-free commercial distribution. Make screensavers from images, video and swf flash, add background music and smooth sprite and transition effects. Screensaver Factory is very easy to use, and it enables you to make self-installing screensaver files and CDs for easy setup and distribution. Screensaver Factory is the most advanced software of its kind.
Click on the Export button after you’ve finished editing your webinar and proceed to select the location on the hard drive where your video will be saved, file format or the resolution of the video. Alternatively, you can upload the webinar to YouTube, Vimeo, Facebook or Twitch directly from Filmora Scrn.
Following these simple steps will help you produce insightful and well-rounded webinars that will attract a lot of attention online.

Tips for Recording Webinars
There is much more to making a webinar than just hitting the Record button, so in order to give your videos a more professional look, you should prepare the intro and outro graphics before you start editing your webinar and quickly add them after you’ve completed the recording session.
Making sure that all the settings are adjusted properly and that the amount of background noise is at the very minimum is advised if you’d like to go through the process of making a webinar with Filmora Scrn quick and smoothly.
Max Wales
Max Wales is a writer and a lover of all things video.
Follow @Max Wales
Max Wales
Mar 27, 2024• Proven solutions
A career is a journey on which we are continually learning and developing new skills that make us better professionals. Finding new ways to acquire or share knowledge is essential if becoming successful is your goal. A webinar or a web-based seminar is just one of many ways to connect with like-minded colleagues that share the same interests and gain fresh input on important subjects about the field you are working in.
Recording webinar with Filmora Scrn enables professionals from all walks of life to share the knowledge and experience they have with people around the globe. If you are thinking about starting your own webinar, you’ve come to the right place because in this article we are going to take you, step by step, through the process of recording a webinar with Wondershare Filmora Scrn.
![]()

The All-in-One Screen Recorder & Video Editor
- Record desktop screen, voiceover, and webcam simultaneously
- Edit recorded clips quickly with a wide range of professional tools
- Built-in plentiful templates and effects
- Export to MP4, MOV, MKV, GIF and multiple formats
For Win 7 or later (64-bit)
For macOS 10.12 or later
Secure Download
 DLNow Video Downloader
How to Record Webinars
Producing your first webinar doesn’t require you to be a video-making wizard since Filmora Scrn makes this process simple. Let’s have a look at the steps you’ll need to take in order to record a webinar.
1. Download and Install Filmora Scrn
Visit Filmora Scrn’s official webpage and download this amazing screen recording software. Once the software is installed on your PC, you can launch it and start adjusting the recording settings.
2. Setting up the screen recording session

WPS Office Premium ( File Recovery, Photo Scanning, Convert PDF)–Yearly
Select the Quick Capture option in the software’s welcome screen and proceed to click on the Setting menu. This action will give you access to the screen recorder’s video recording options. Filmora Scrn lets you change Screen, Audio and Camera options. Adjusting the portion of the screen you’d like to record or choosing the frame rate of the recording can be done from the Screen menu, while in the Camera section you can pick a web camera you intend on using in your webinar, change a resolution or set a frame rate for the footage you’ll be recording with a webcam.
Enabling the Camera option will allow you to capture your screen simultaneously while recording a video with your webcam. This option is particularly useful for people that want to create a webinar that also features them as narrators.
The Audio option contains Microphone and Computer audio options that can be used to select the microphone you are going to utilize during the screen recording session.
3. Recording a webinar

In order to start recording your webinar, you just need to click on the Record button. Filmora Scrn also allows you to record your webcam and your secondary display, which is very convenient for webinar recording. During the session, you can add markers to the footage you’re producing by pressing the F8 key on your keyboard or pause the session with the F9 key.
4. Editing a webinar
You can stop recording by hitting the F10 key on the keyboard again, and once you complete the recording session, the video file you created will be automatically imported into Filmora Scrn’s video editor. Removing the parts of the video you don’t want to feature in the final cut of your webinar or adding fade in and fade out effects can be accomplished with only a few clicks. Furthermore, the Filmora Scrn video editor allows you to remove the background noises, alter the playback speed of the video or add multiple layers to your videos.
Exporting and Sharing a webinar
Click on the Export button after you’ve finished editing your webinar and proceed to select the location on the hard drive where your video will be saved, file format or the resolution of the video. Alternatively, you can upload the webinar to YouTube, Vimeo, Facebook or Twitch directly from Filmora Scrn.
Following these simple steps will help you produce insightful and well-rounded webinars that will attract a lot of attention online.
 vMix 4K - Software based live production. vMix 4K includes everything in vMix HD plus 4K support, PTZ control, External/Fullscreen output, 4 Virtual Outputs, 1 Replay, 4 vMix Call, and 2 Recorders.
Tips for Recording Webinars
There is much more to making a webinar than just hitting the Record button, so in order to give your videos a more professional look, you should prepare the intro and outro graphics before you start editing your webinar and quickly add them after you’ve completed the recording session.
Making sure that all the settings are adjusted properly and that the amount of background noise is at the very minimum is advised if you’d like to go through the process of making a webinar with Filmora Scrn quick and smoothly.
Max Wales
Max Wales is a writer and a lover of all things video.
Follow @Max Wales
- Title: [Updated] 2024 Approved Webinar Video Archive Creation
- Author: Virginia Woolf
- Created at : 2024-07-24 13:03:41
- Updated at : 2024-07-25 13:03:41
- Link: https://visual-screen-recording.techidaily.com/updated-2024-approved-webinar-video-archive-creation/
- License: This work is licensed under CC BY-NC-SA 4.0.